Quick and Dirty Microchip DSPic30f setup
- Mar 8, 2015
- 2 min read
These days there is a huge popularity to develop prototype using Arduino and Raspberry Pi controller. Those are great if you have huge needs in term of computing power, media task or network task however their cost are pretty high compare to the microchip product. They also have huge library to create software very quickly.
Personally I always liked to create stuff the lightest as possible and for there are a lot of applications where you don’t need all those capabilities. For example:
1-Creating a simple control loop
2-Displays and blinking LEDs
3-Filtering signal
4-Driving motors
5-Serial/Bluetooth basic communication
Using Microchip cost from free (via free samples online) to a few bucks compared to the other controller that cost over $35. As it can take a while to get used, here I am giving my minimalist setup to get running as quickly, simply and cheaper as possible. I am using the DSPic30F in this example as to me it is a convenient chip but it can be easily adapted to other microchip micro controller.
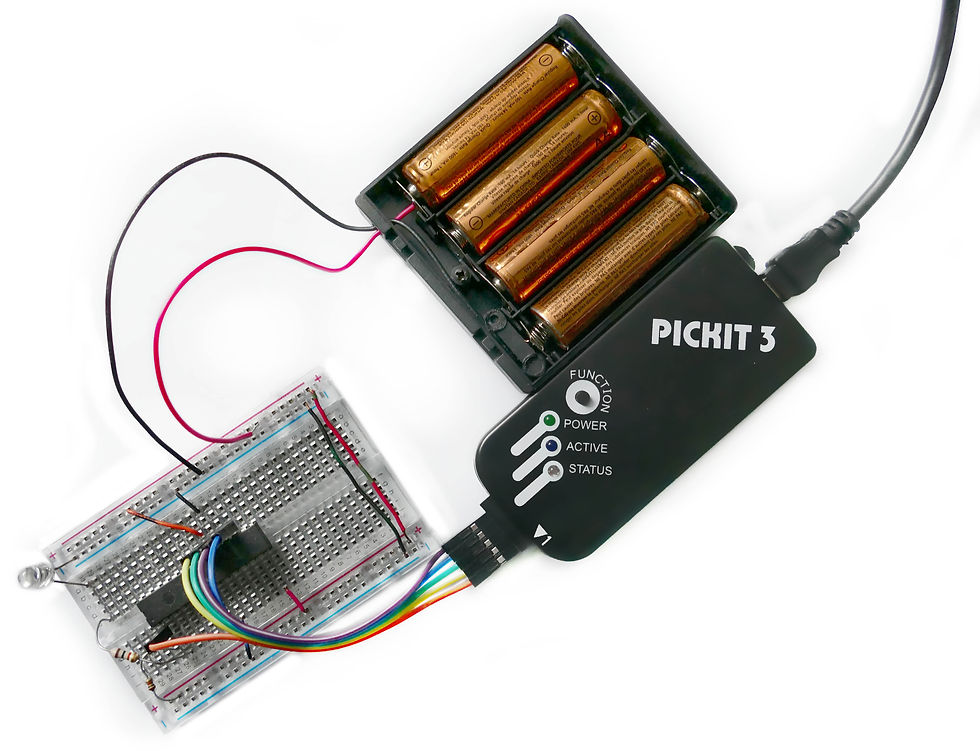
Here are the minimal parts required:
A Microchip (Ex: DSPic30F2010)
A Breadboard
A 10 kOhms Resistor (approx)
A 5V power source (Ex: 4 Rechargeable Batteries with holder (4x1.2V ~ 5V))
That’s it!
Note that you will also need a programmer for this project. If you don’t already own one it is a one time buy required. You can find on ebay some Pic Lit 3 clone under $30 that does the job.
In this first example I will have a LED blinking so obviously we will also need:
A LED
A 1kOhms Resistor (approx)
There is the schematic:

The secret to have that fewer part are the following assumptions:
1-No need to filter power source as battery power is almost an ideal source.
2-The use of the internal clock. (Limited speed and limited precision).
Here is the code to compile:
/******************************************************************************/
/* Files to Include */
/******************************************************************************/
#include <stdio.h>
#include <string.h>
#include <xc.h>
#include <libpic30.h>
_FOSC(CSW_FSCM_OFF & FRC); //Use internal oscillator
_FWDT(WDT_OFF);
_FBORPOR(MCLR_EN);
/******************************************************************************/
/* Main Program */
/******************************************************************************/
void InitializeIO()
{
//IO Configurations
ADPCFG = 0xFFFF; //Set PortB to digital inputs (not analog)
TRISBbits.TRISB0 = 0; //Output
}
void InitializeTimer1()
{
IEC0bits.T1IE = 1; //Enable interrupts from Timer 1
IPC0bits.T1IP = 2; //Set interrupt priority
PR1 = 50000; //Set speed
T1CONbits.TCKPS = 3;//Prescaler 0=1:1, 1=1:8, 2=1:64 and 3=1:256.
T1CONbits.TCS = 0;
TMR1 = 0;
T1CONbits.TON = 1;//Activate Timer
}
int main(void)
{
InitializeIO(); //Configure output
InitializeTimer1(); //Configure timer and interrupt
while (1); //Do nothing and wait for interruption
}
void __attribute__((interrupt, no_auto_psv)) _T1Interrupt(void)
{
PORTBbits.RB0 = !PORTBbits.RB0; //Inverse the output
IFS0bits.T1IF = 0;//Reset Timer1 Flag (Must be the last command in this function.)
}


Comments